


CoinPayments Integration Information Steps
Overview of Step 2: Integration
Now that your CoinPayments account is ready up and customised to your preferences, it’s time to combine it into what you are promoting operations. Relying on the extent of automation you want and the kind of platform you employ, CoinPayments gives a number of integration choices tailor-made to what you are promoting:
- Invoicing
- Cost Buttons
- Pre-Constructed eCommerce Plugins
- Customized APIs
Invoicing
For companies providing on-demand providers, the CoinPayments invoicing device gives a straightforward strategy to obtain funds with out requiring any coding information. This totally automated function ensures a easy expertise for each you and your shoppers.
Methods to Get Began
- Entry the Invoicing Device:
- Navigate to the Invoicing tab in your CoinPayments dashboard.
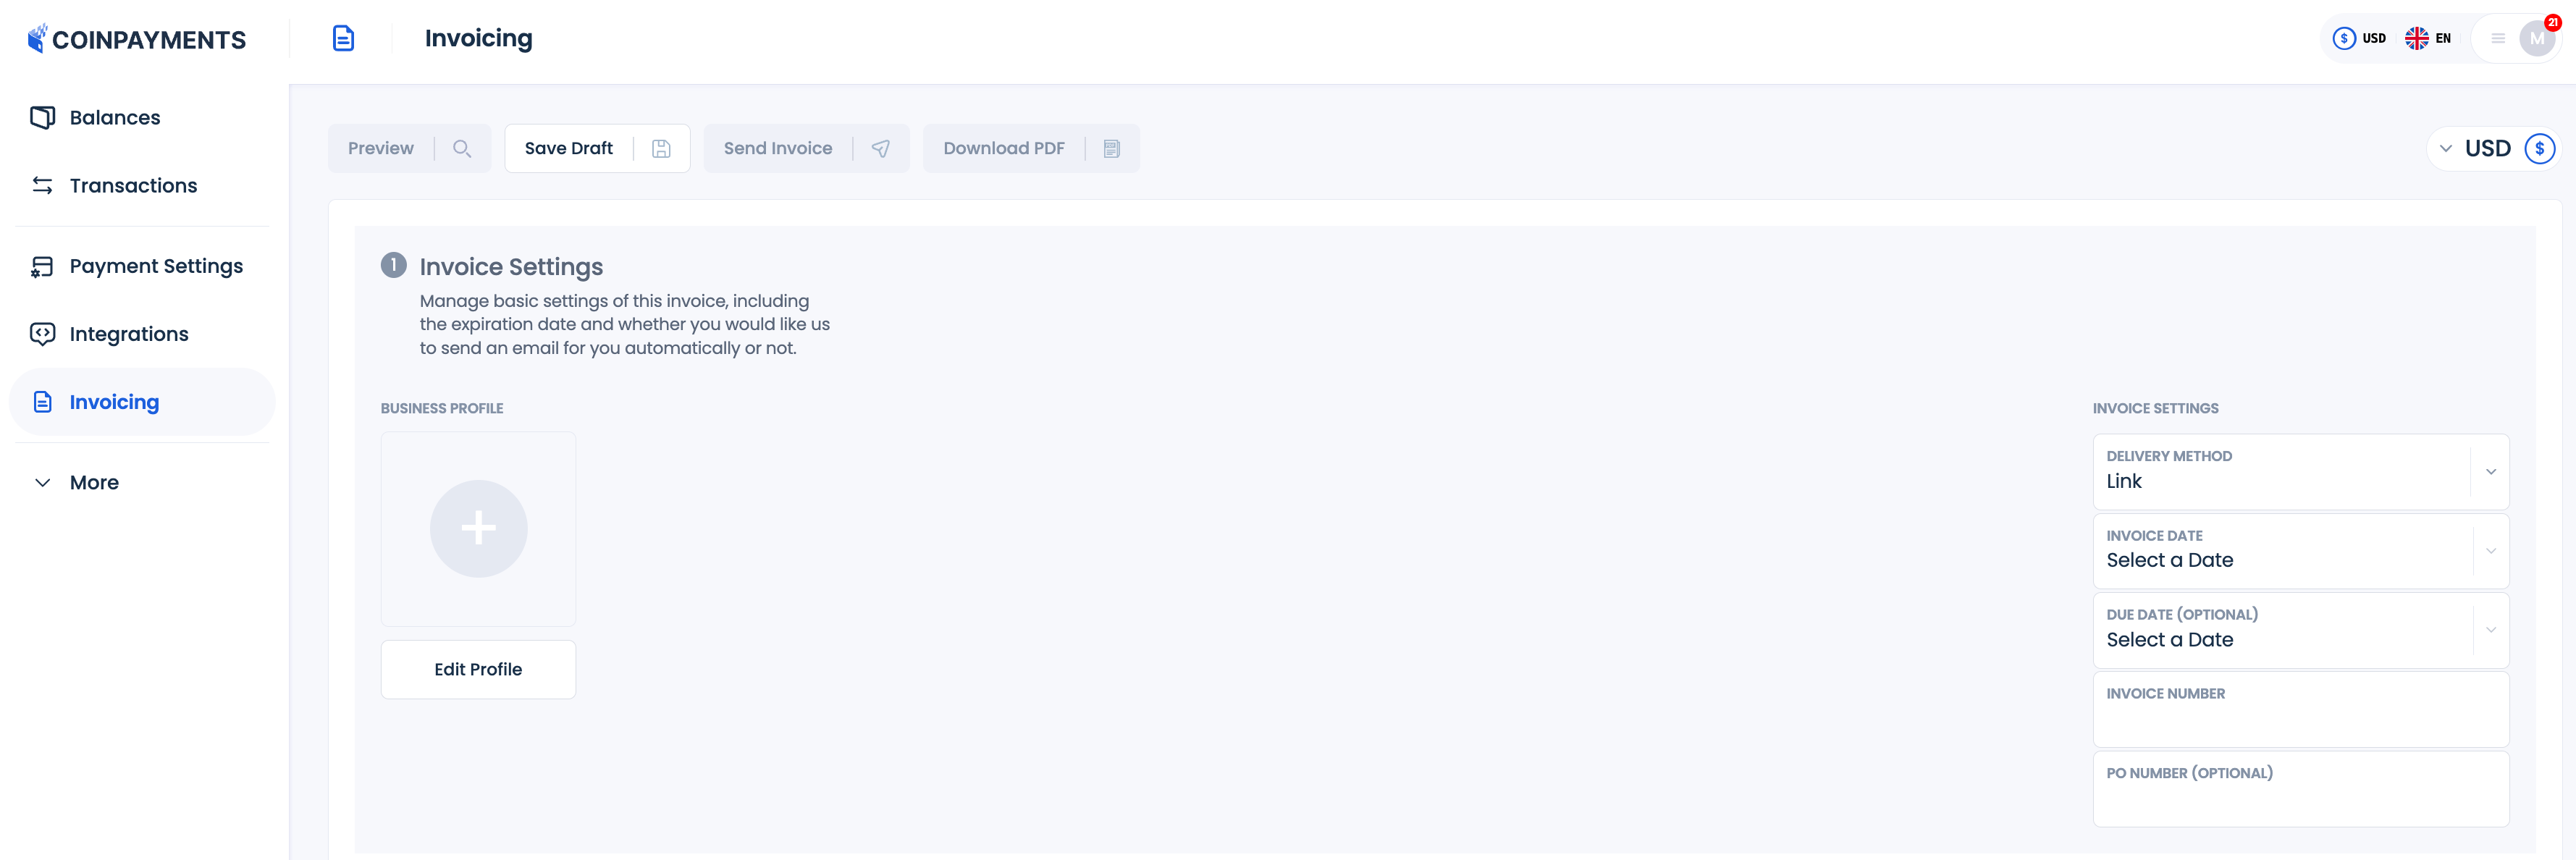
- Within the Bill Settings part, click on Edit Profile so as to add what you are promoting particulars. These particulars will seem on each bill, so be sure that they’re correct and full.
- Select the way you’d prefer to ship the bill. You may both ship it robotically to your shopper’s electronic mail or manually ship them a hyperlink in the event you want extra management.
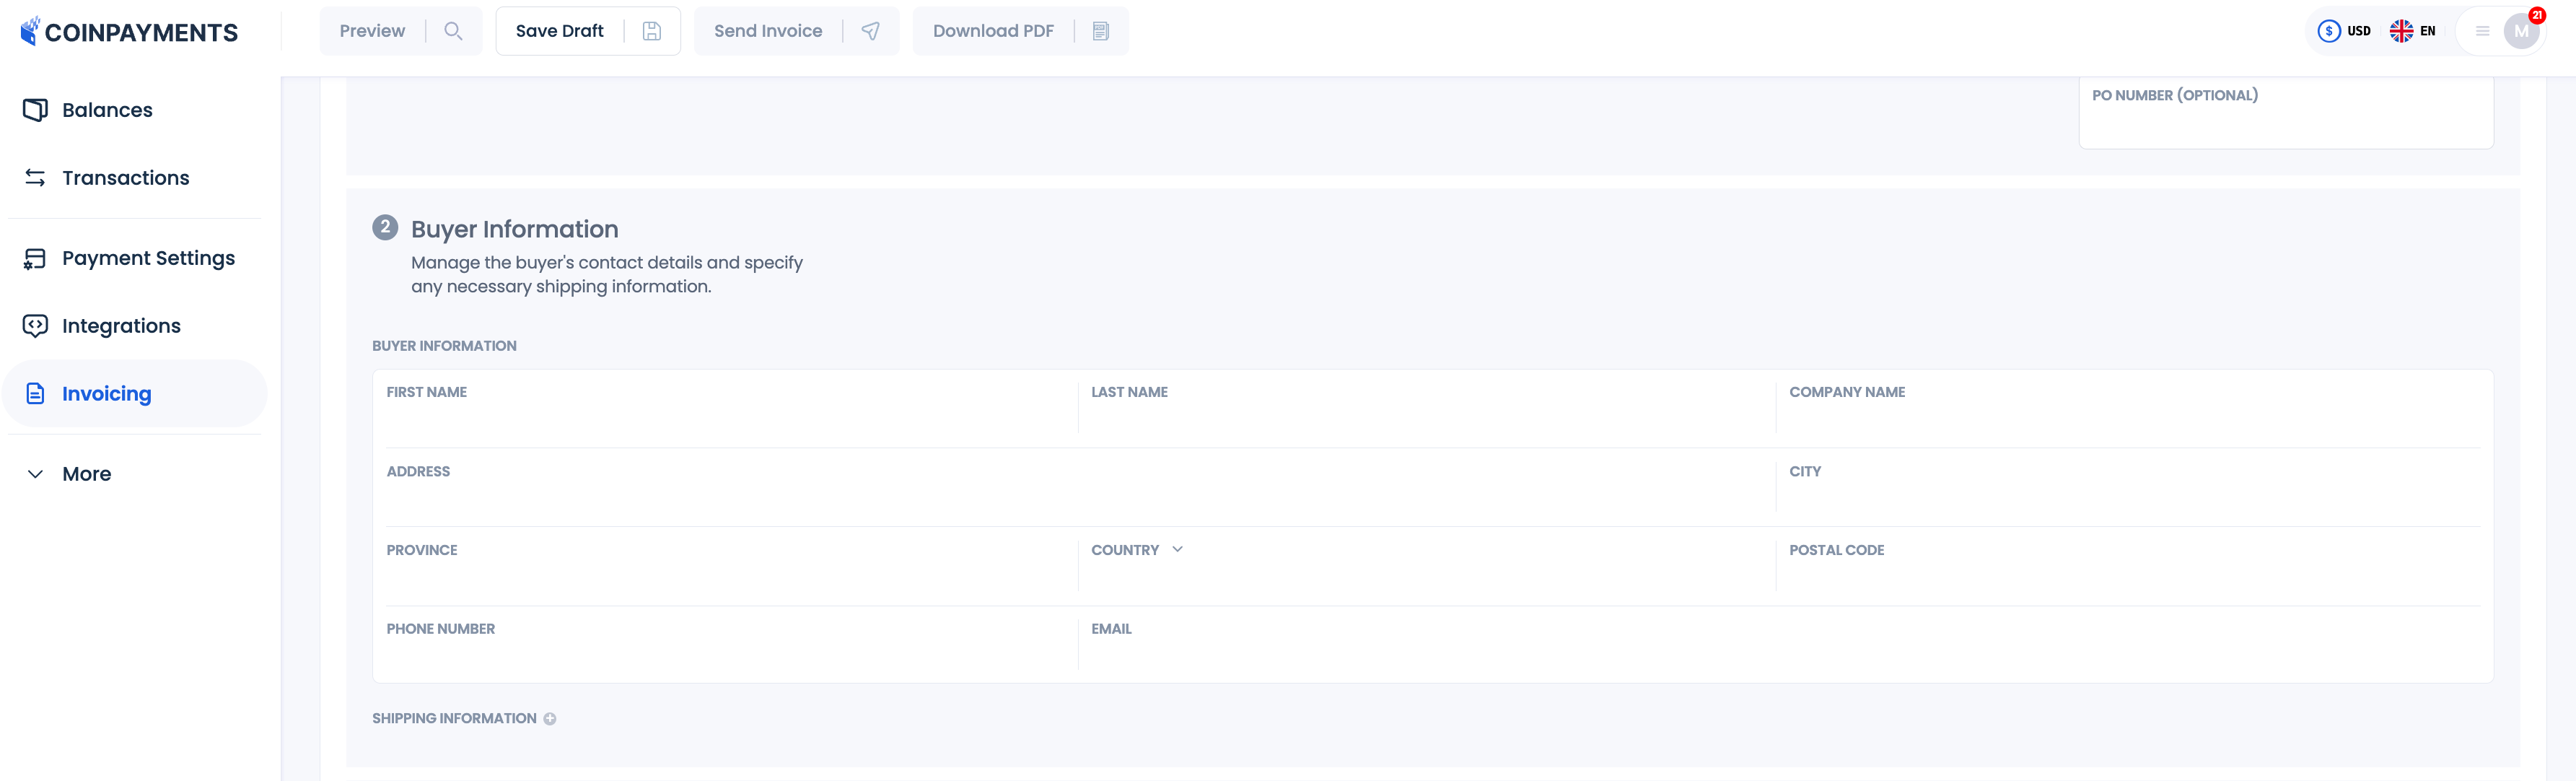
- Add Purchaser Data:
- Enter the client’s enterprise identify, contact identify, and electronic mail handle within the Purchaser Data part.
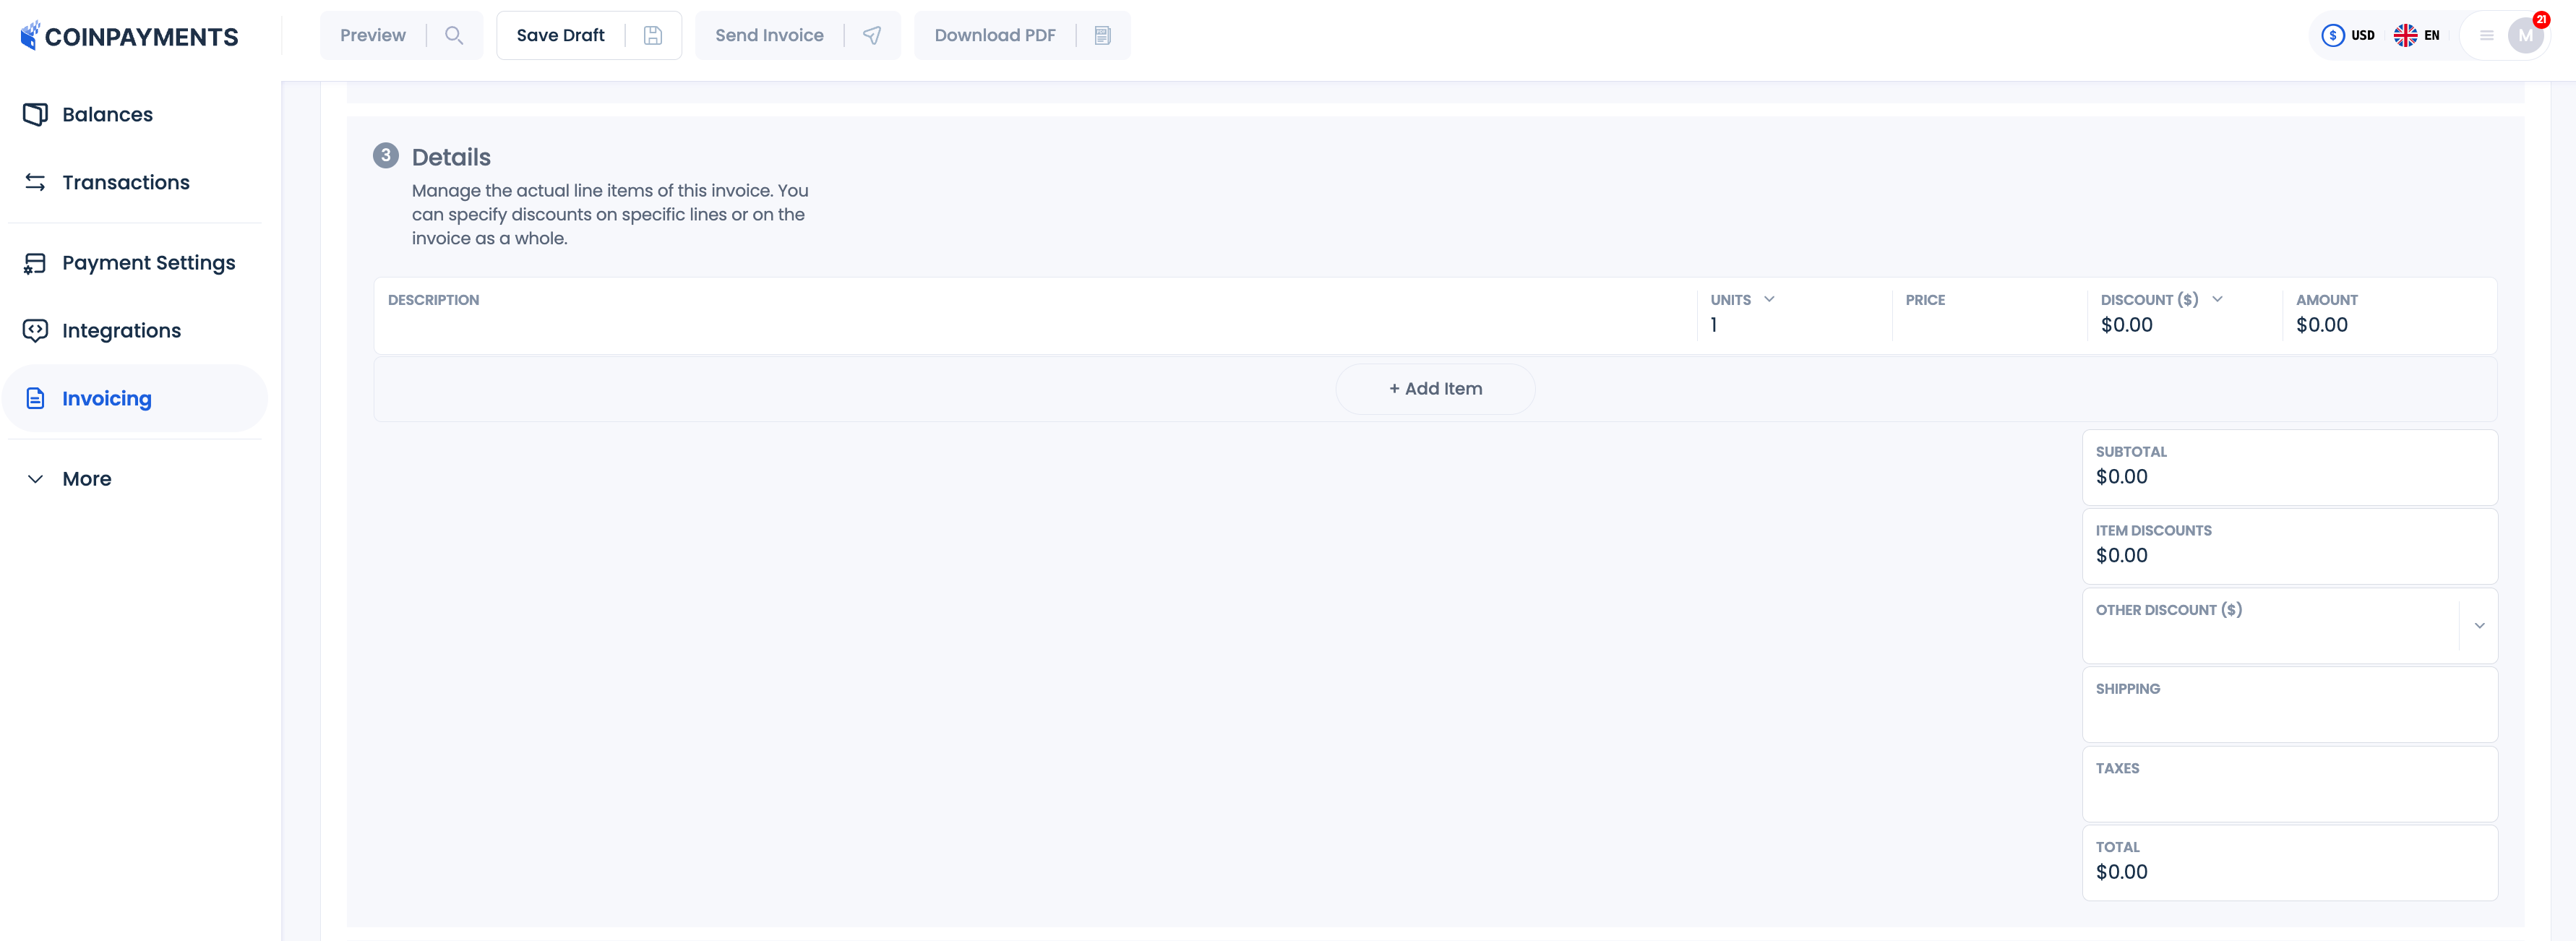
- Fill in Bill Particulars:
- Specify what your shopper is buying, the full quantity, and every other related particulars.
- Optionally, you possibly can add a reduction to supply a particular deal on your shopper.
- Embody Notes and Situations:
- Present any extra notes or phrases, if mandatory, to make sure readability on your shopper.

- Preview and Ship the Bill:
- Earlier than sending, preview the bill to see precisely the way it will seem to your shopper.
- You may select to ship the bill immediately through electronic mail, put it aside as a draft for later or obtain as PDF.

Cost Buttons
The Cost Button integration is a fast and straightforward method so as to add cryptocurrency cost choices to your web site. This technique is right for:
- Companies with fixed-price choices.
- Charities or organizations searching for so as to add a donation button.
- Eventualities the place the worth linked to the button is fastened (no cart performance).
Not like different integration strategies, this device requires minimal coding information, making it a easy but highly effective answer for many companies.
Methods to Get Began
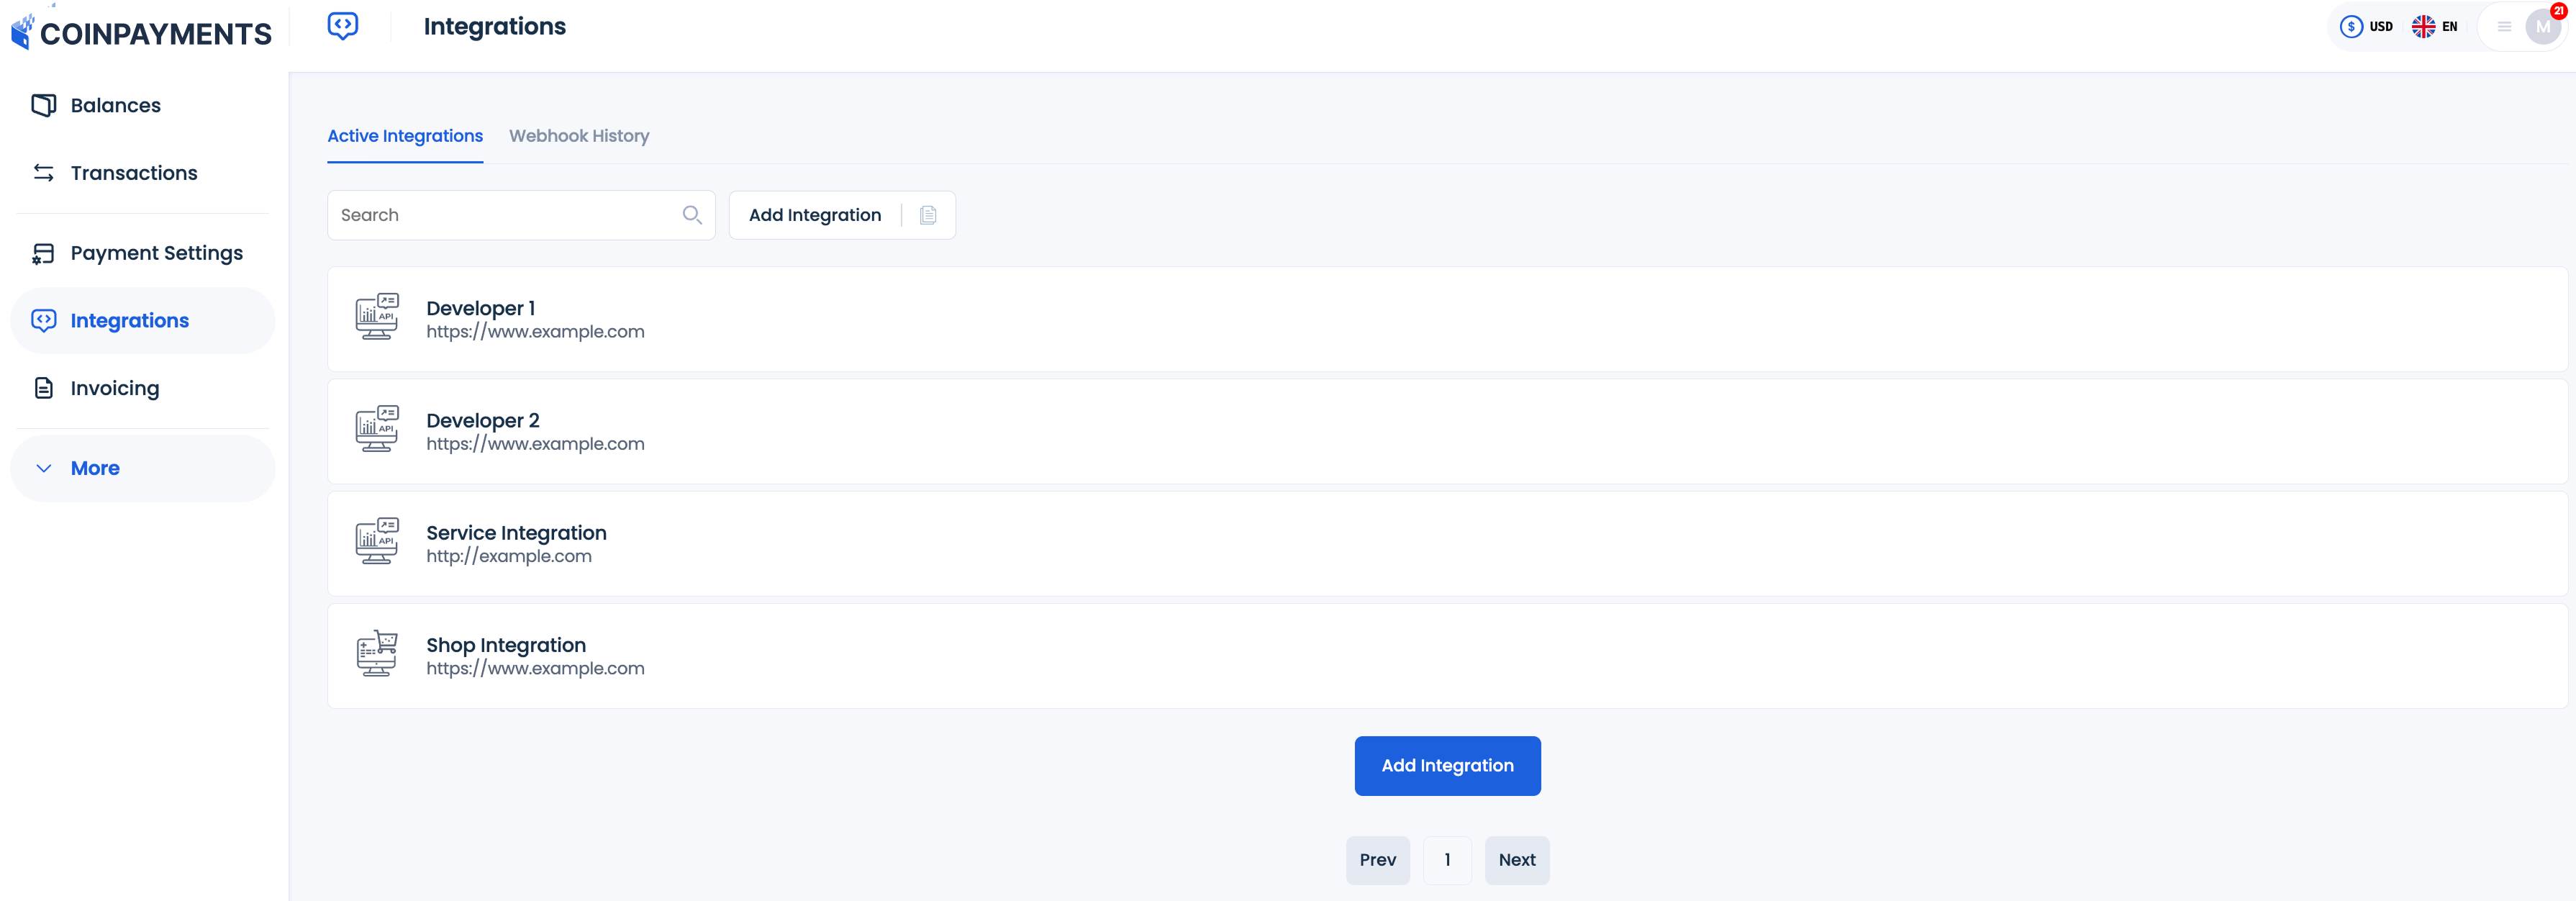
- Navigate to the Integrations Tab:
- Go to the Integrations tab in your CoinPayments dashboard and click on on Add Integration.
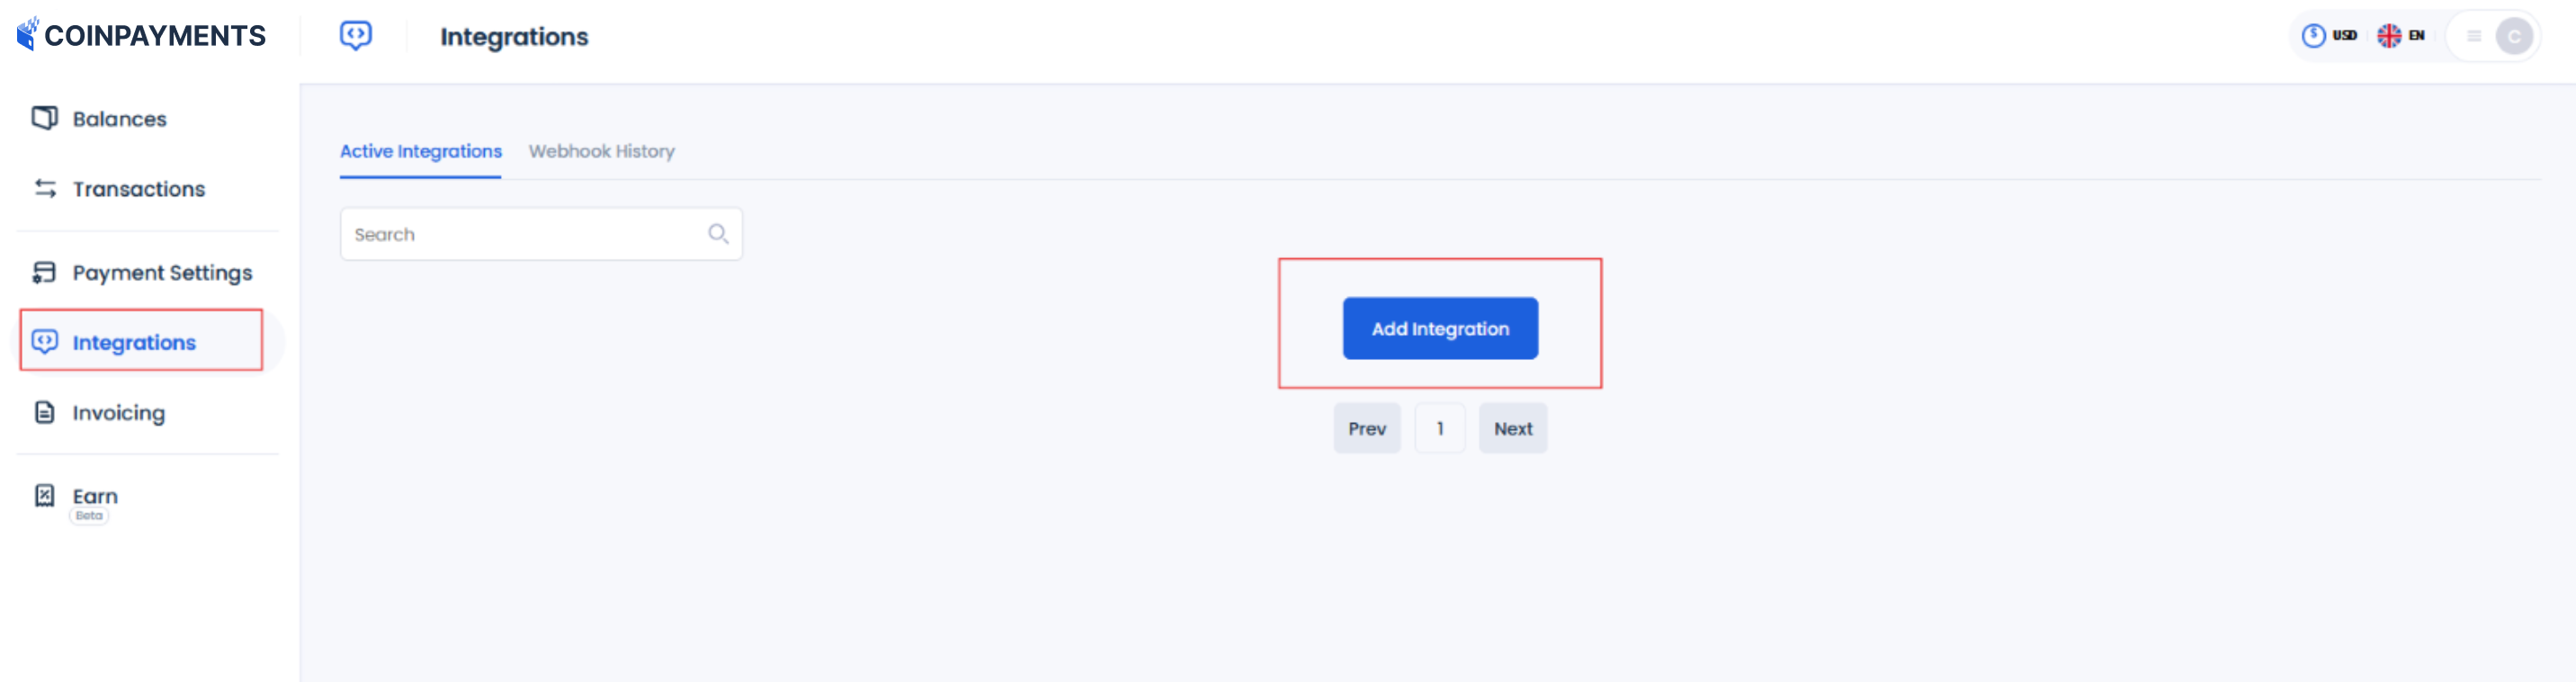
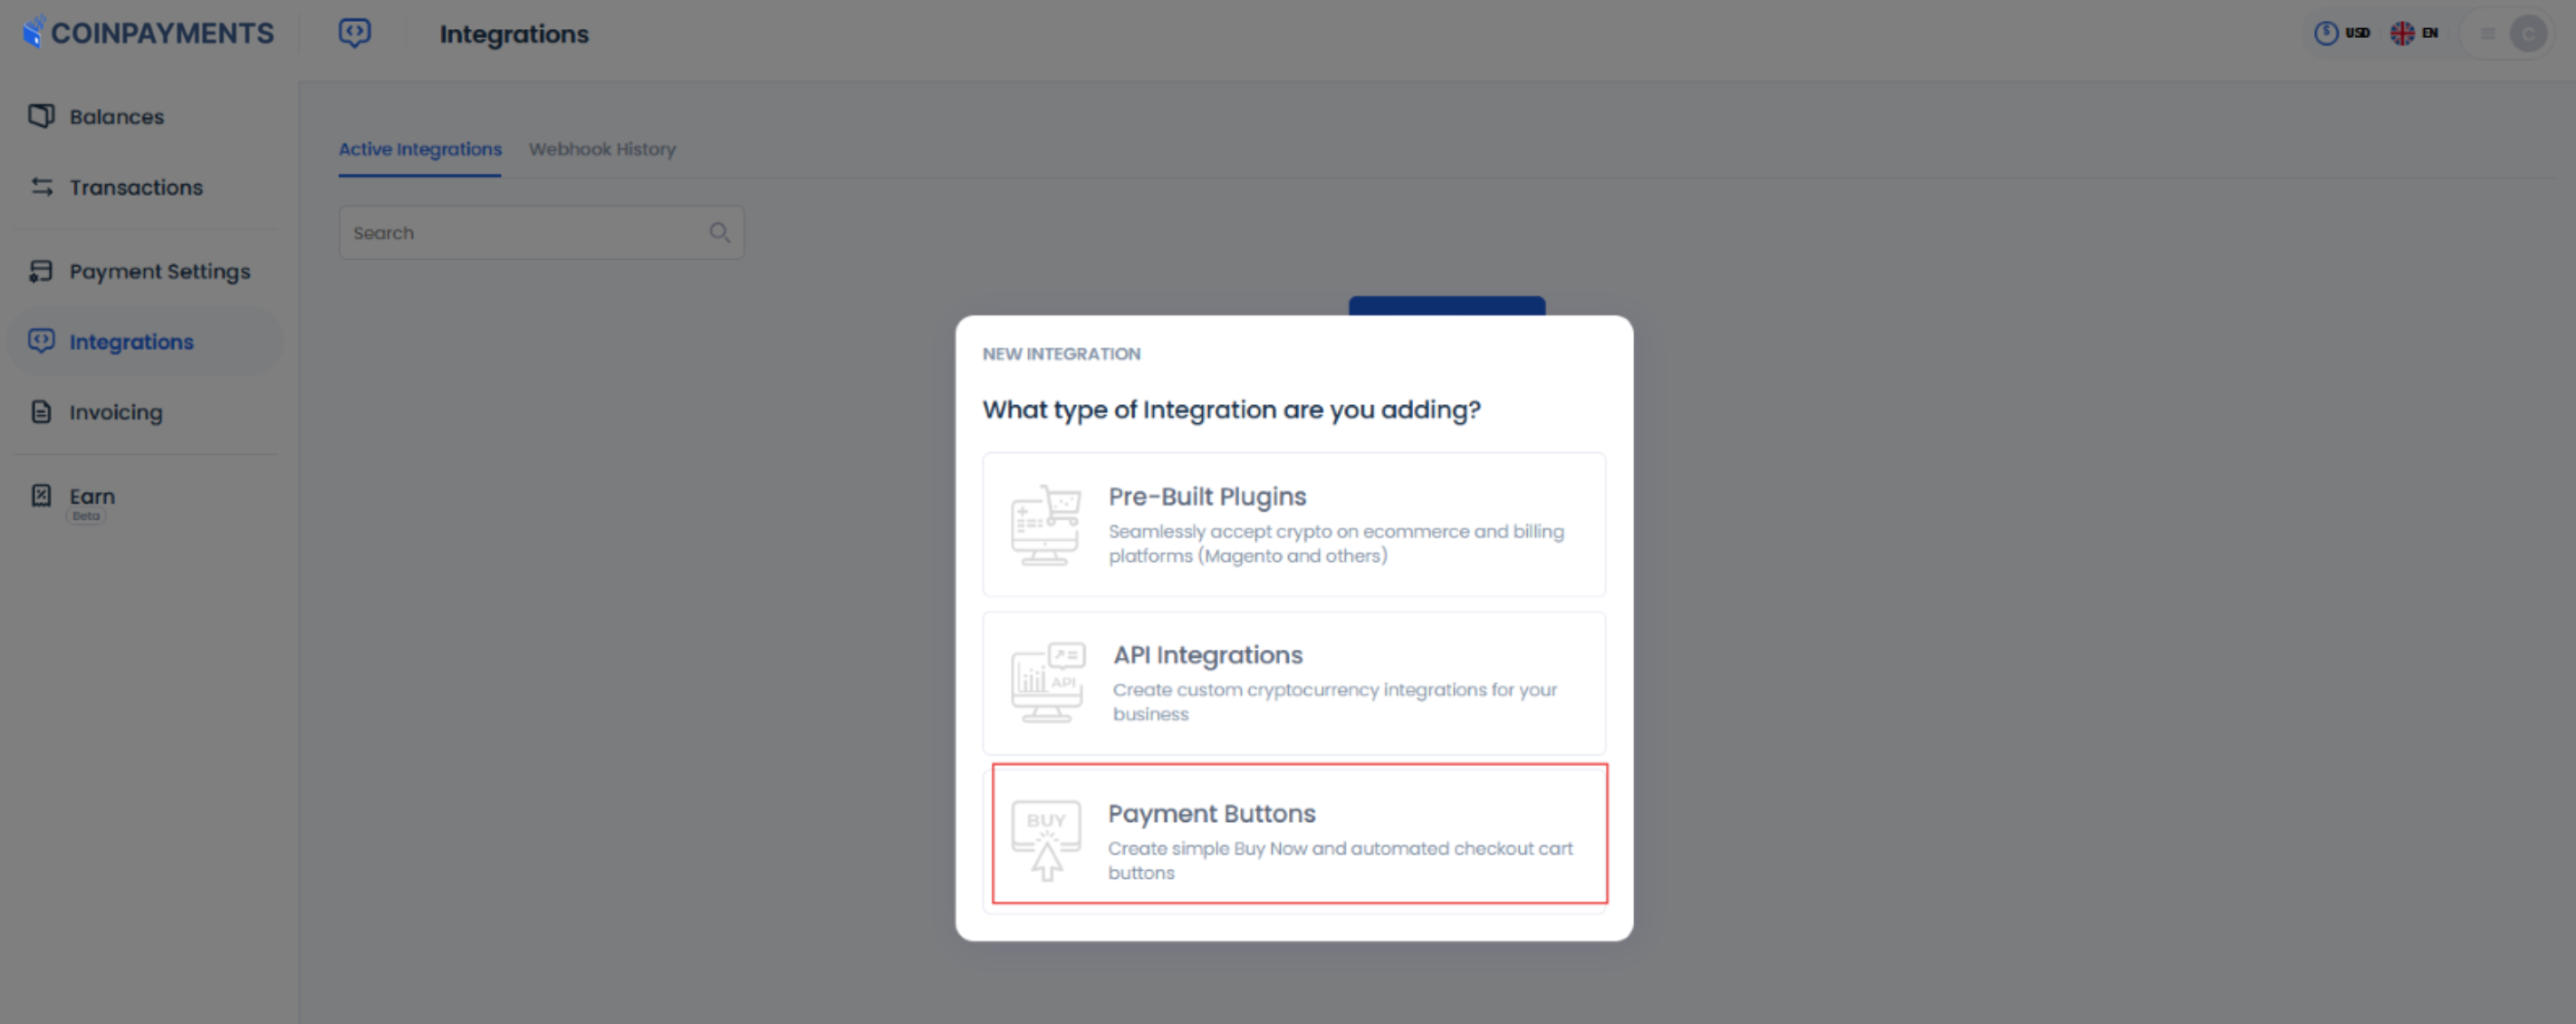
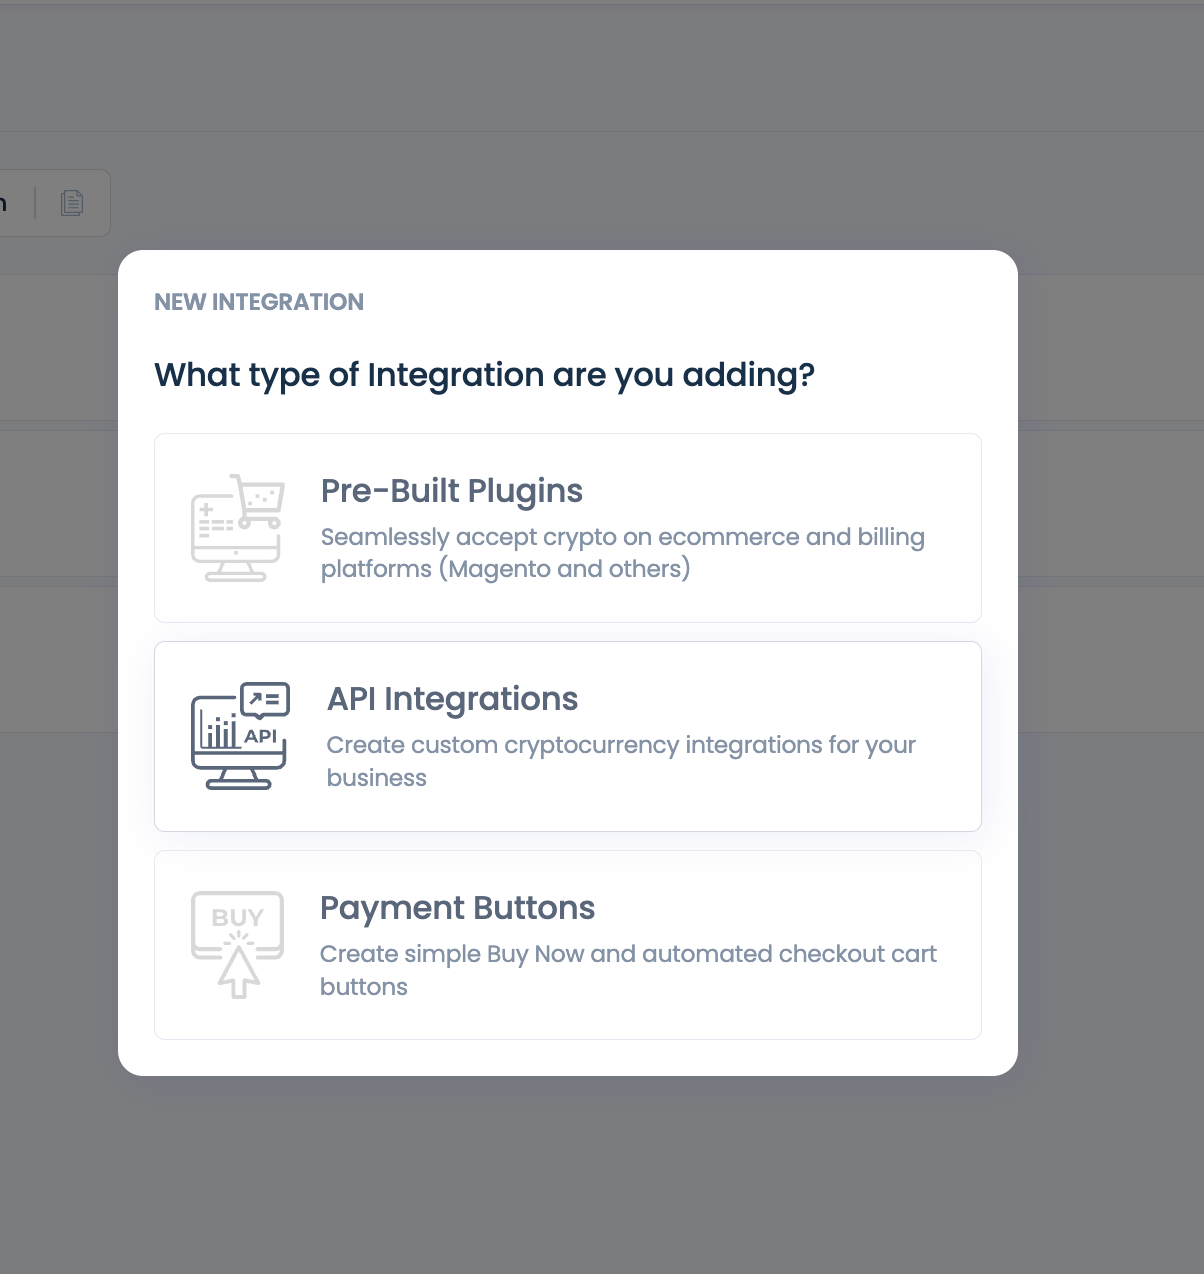
- Choose Cost Buttons:
- When prompted to decide on the kind of integration, choose Cost Buttons from the choices accessible.
- Entry the Cost Button Wizard:
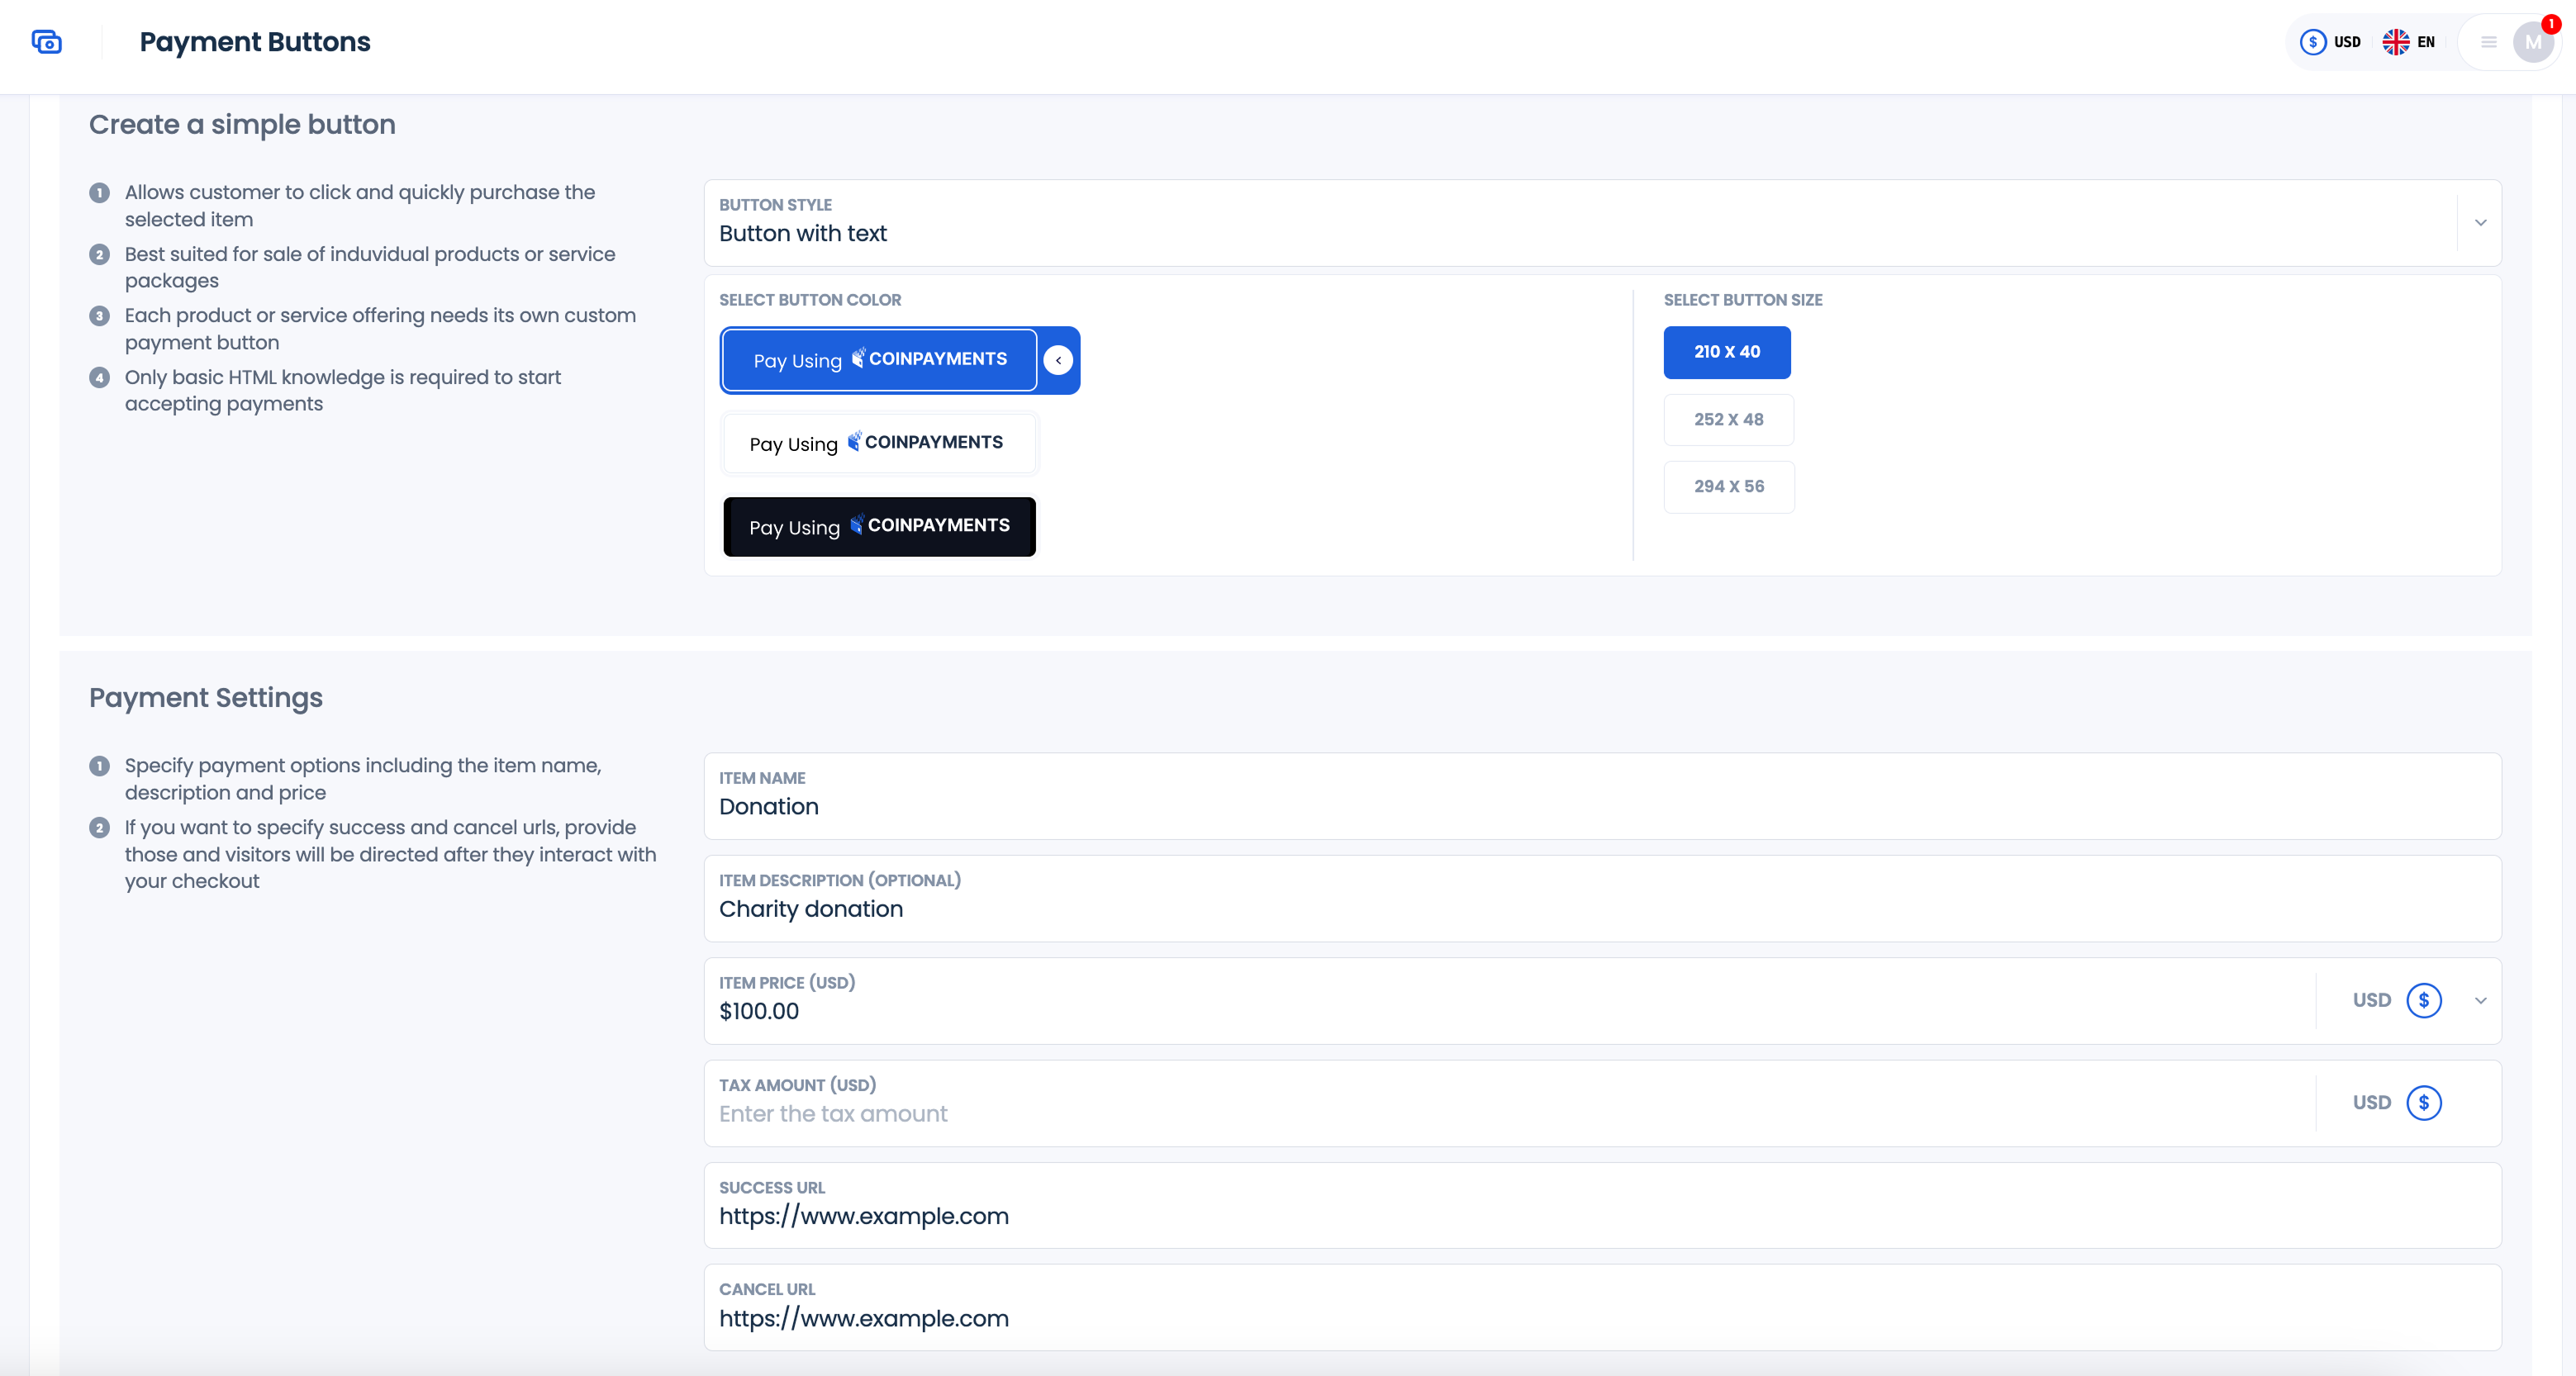
- Navigate to the Cost Buttons part in your CoinPayments dashboard.
- Choose the button’s fashion, coloration, and dimension to fit your preferences.
- Create Your Cost Button:
- Enter the related particulars, such because the product identify, value, and foreign money.
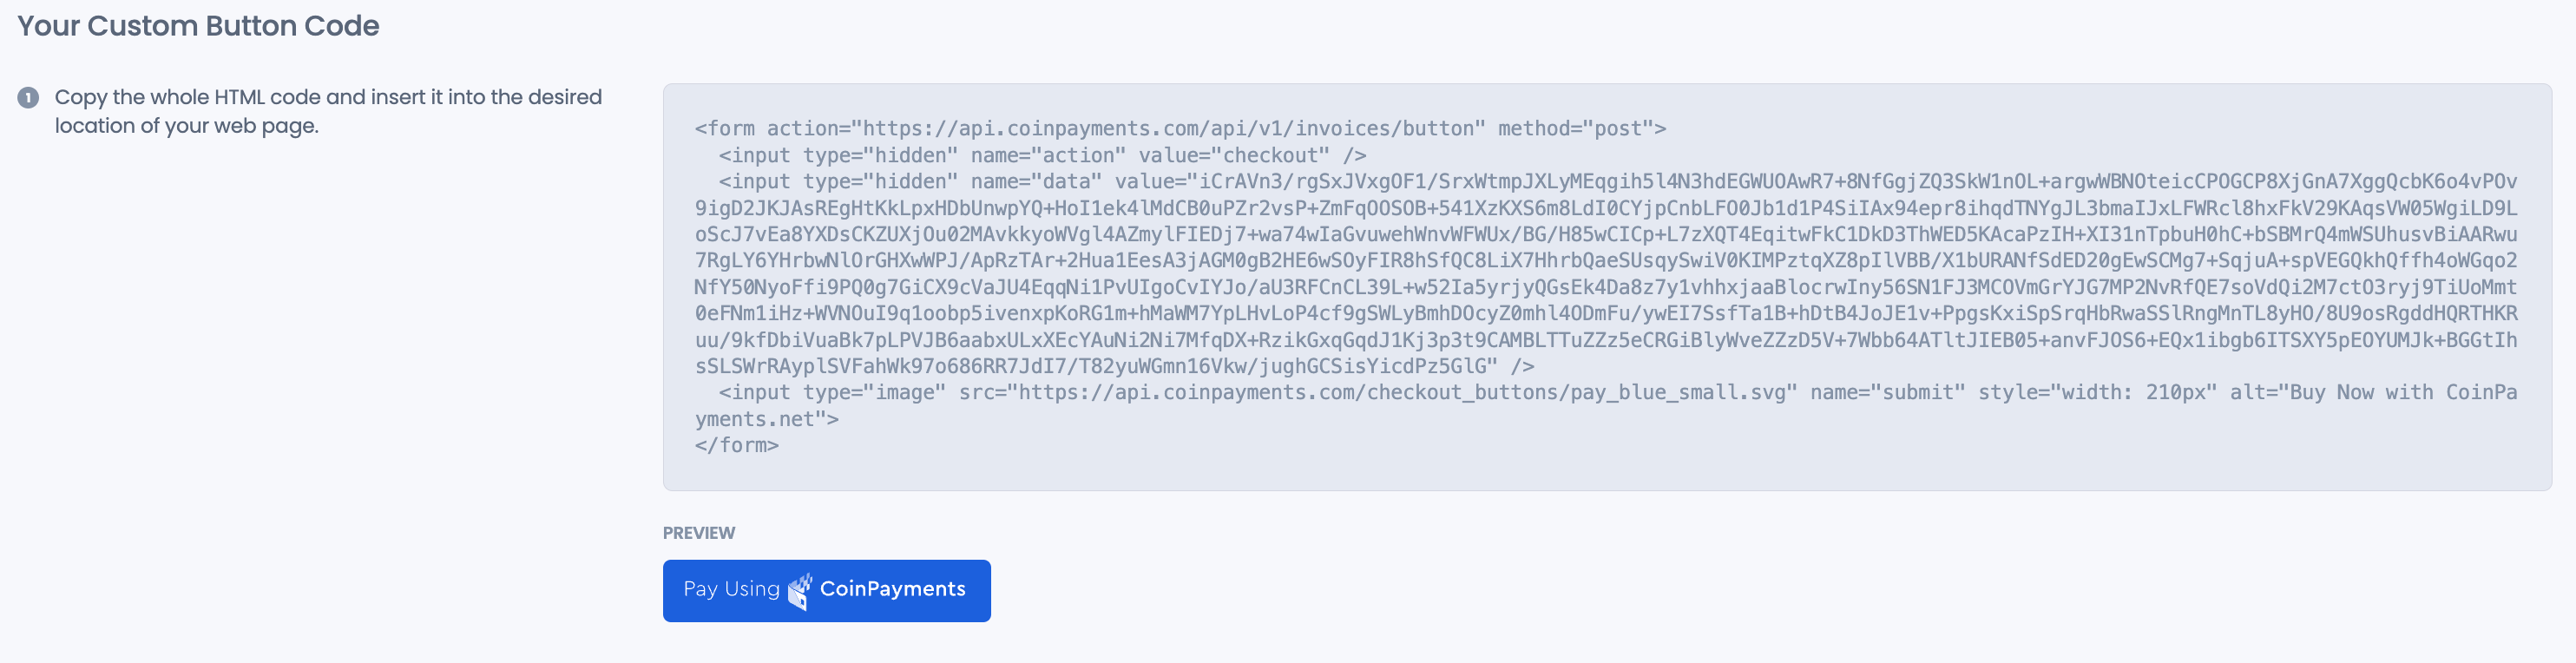
- Generate Button Code:
- As soon as all particulars are crammed in, the system will robotically generate the code on your button.
- Place the Button on Your Web site:
- Copy the generated code and paste it into the specified location in your web site.
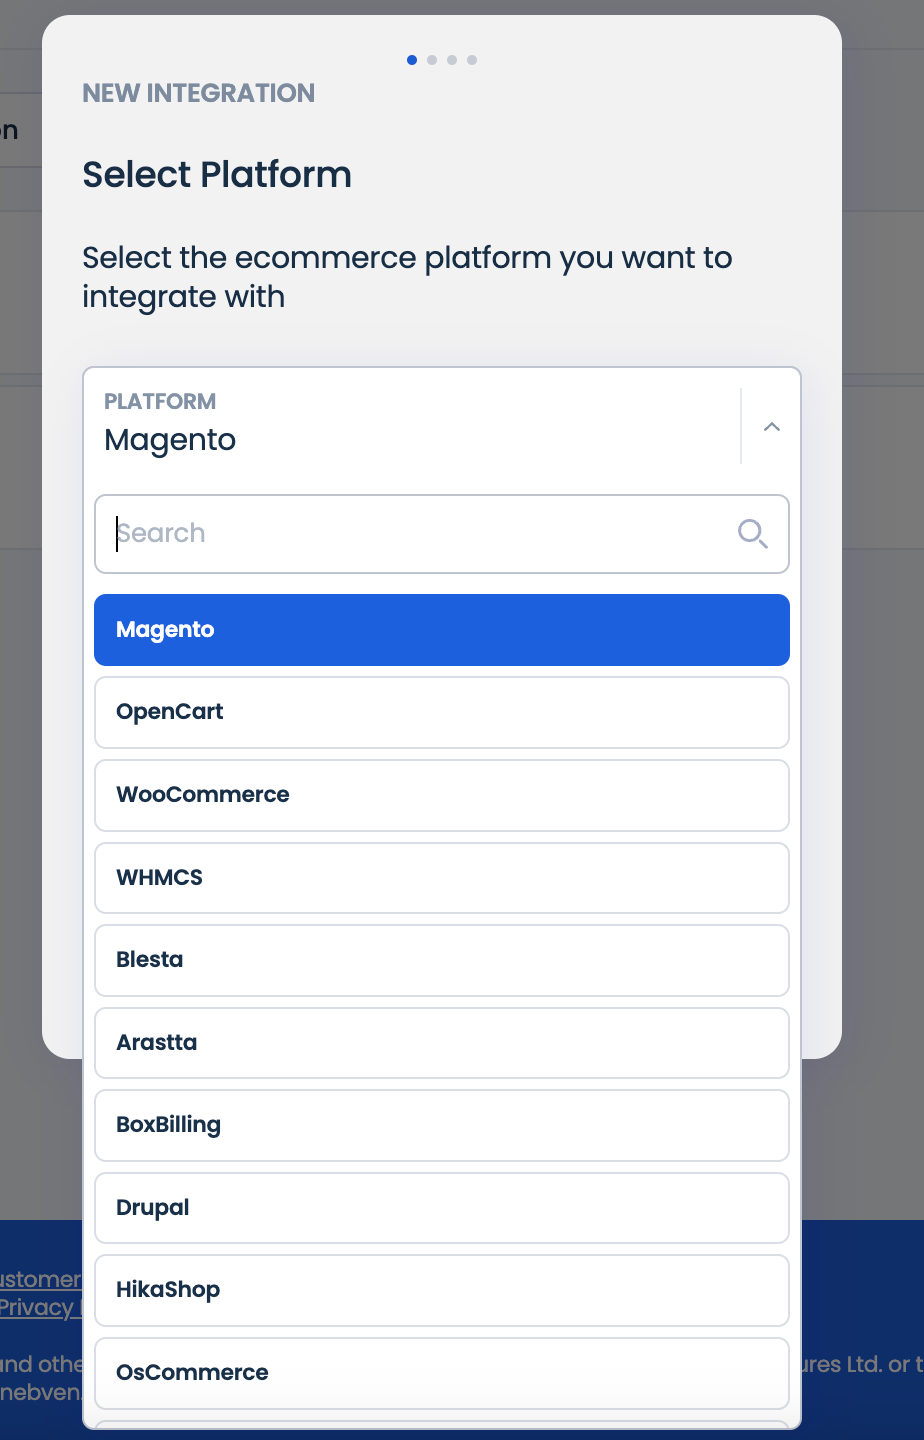
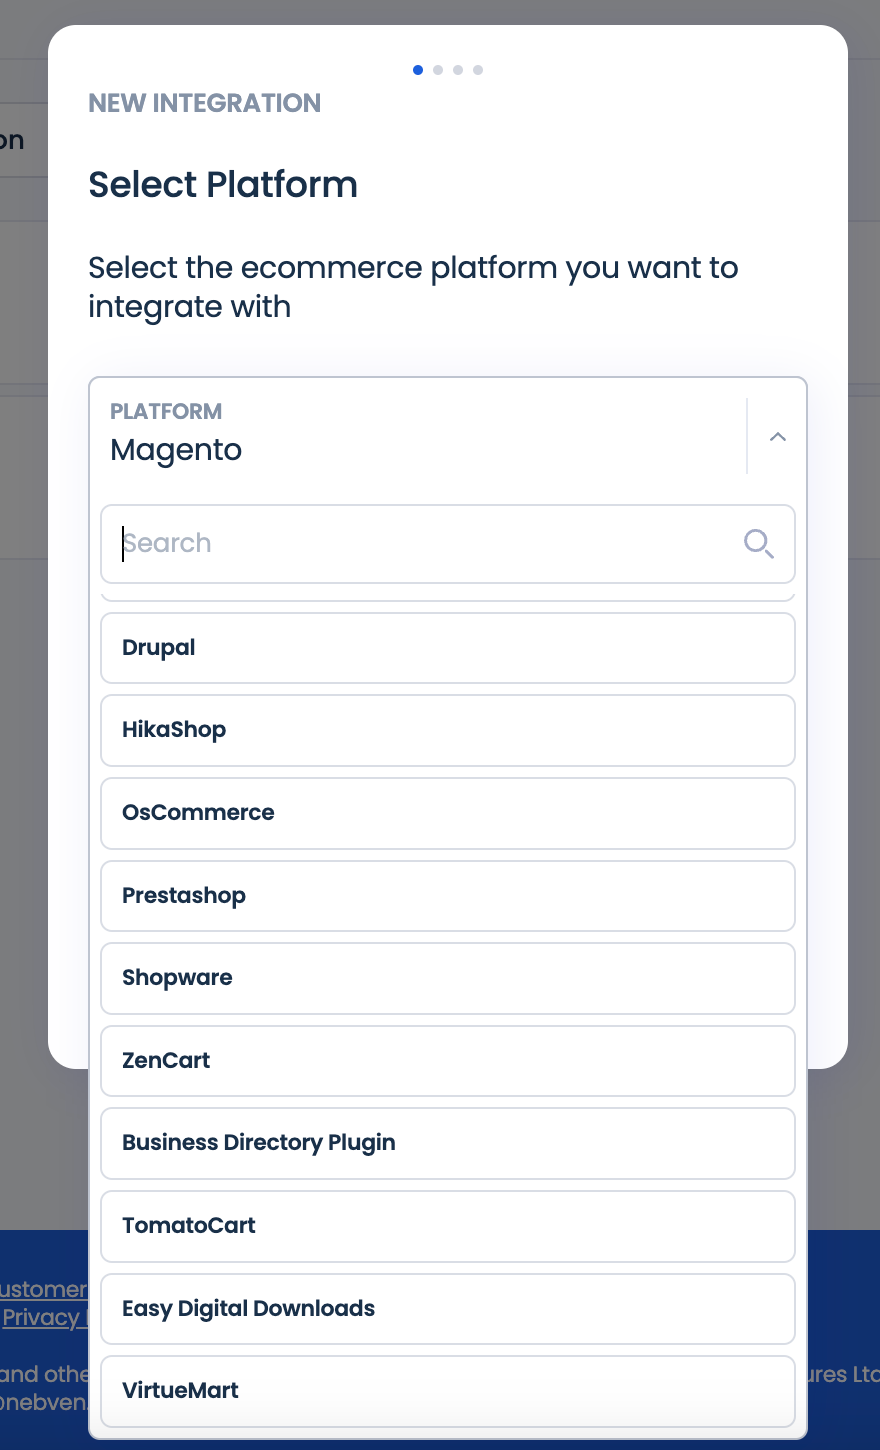
Pre-Constructed eCommerce Plugins
Pre-Constructed eCommerce Plugins are perfect for on-line shops utilizing platforms like Magento or different fashionable eCommerce methods. These plugins save time by providing ready-to-use options, eliminating the necessity to code from scratch.
This integration gives entry to a wide range of instruments, together with:
- Cost buttons.
- Direct deposits and withdrawals.
- Pockets creation and administration.
- Function-based entry controls for enhanced safety.
Methods to Get Began
- Navigate to the Integrations Tab:
- Go to the Integrations tab in your CoinPayments dashboard and click on on Add Integration.

- Choose Pre-Constructed Plugins when prompted to decide on the kind of integration
- Browse Obtainable Plugins:
- Scroll by way of the checklist to search out the plugin that corresponds to your eCommerce platform.
- Obtain the one which corresponds to your eCommerce platform and set up the plugin.
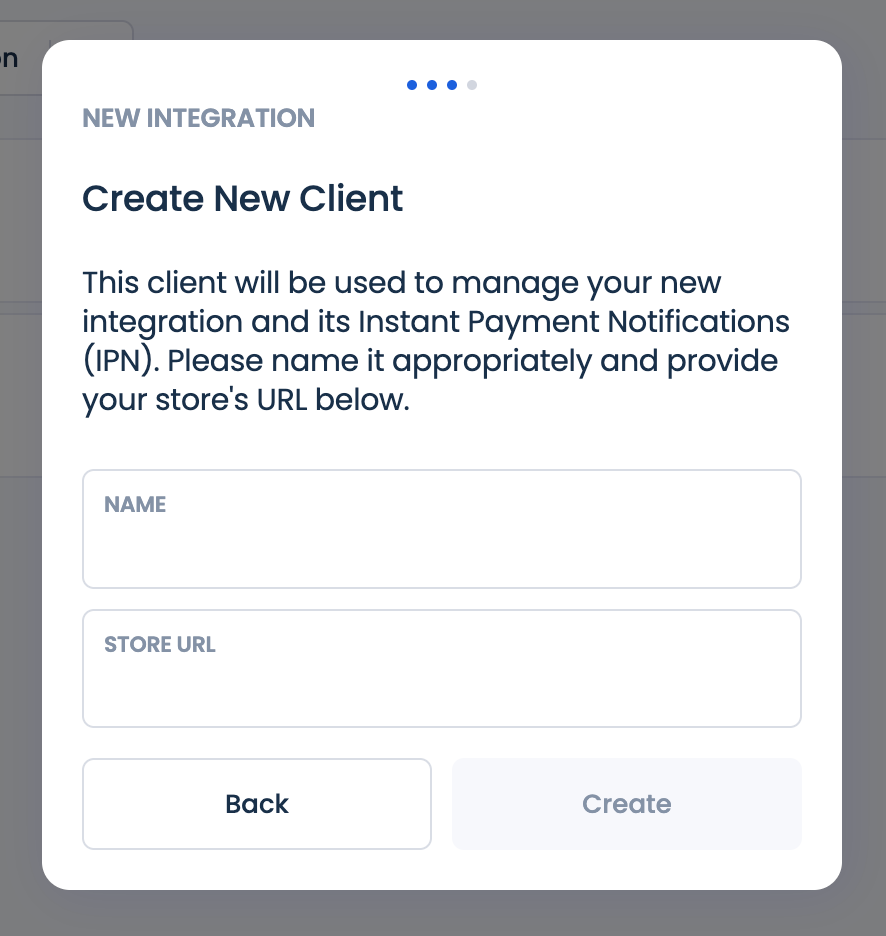
- Present Your Web site Hyperlink:
- Present your retailer particulars and hyperlink to your retailer web site to make sure seamless communication between your eCommerce platform and CoinPayments.
- Configure the Plugin:
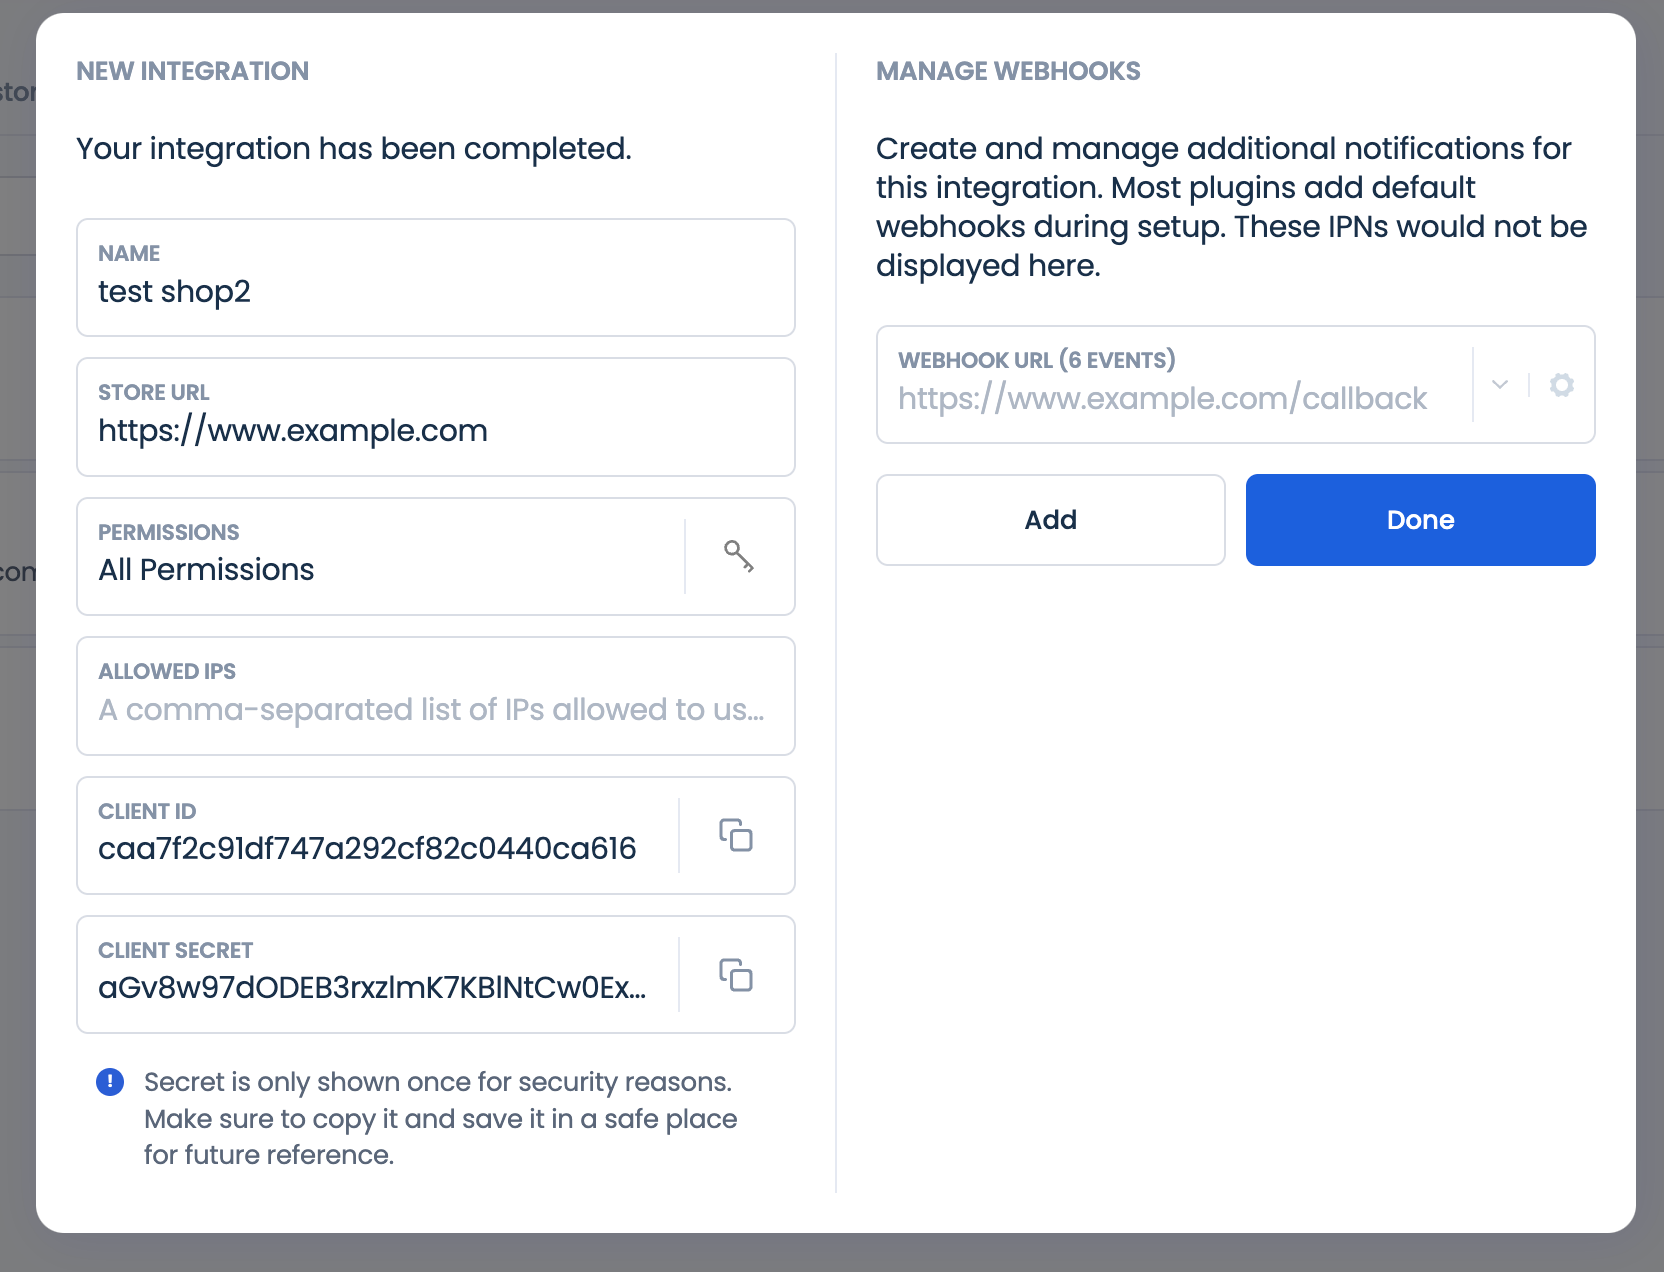
- Use your CLIENT ID and CLIENT SECRET within the Plugin Configuration wizard to attach your eCommerce platform with CoinPayments.
Be aware: Your Shopper Secret is proven solely as soon as for safety functions, so retailer it securely.
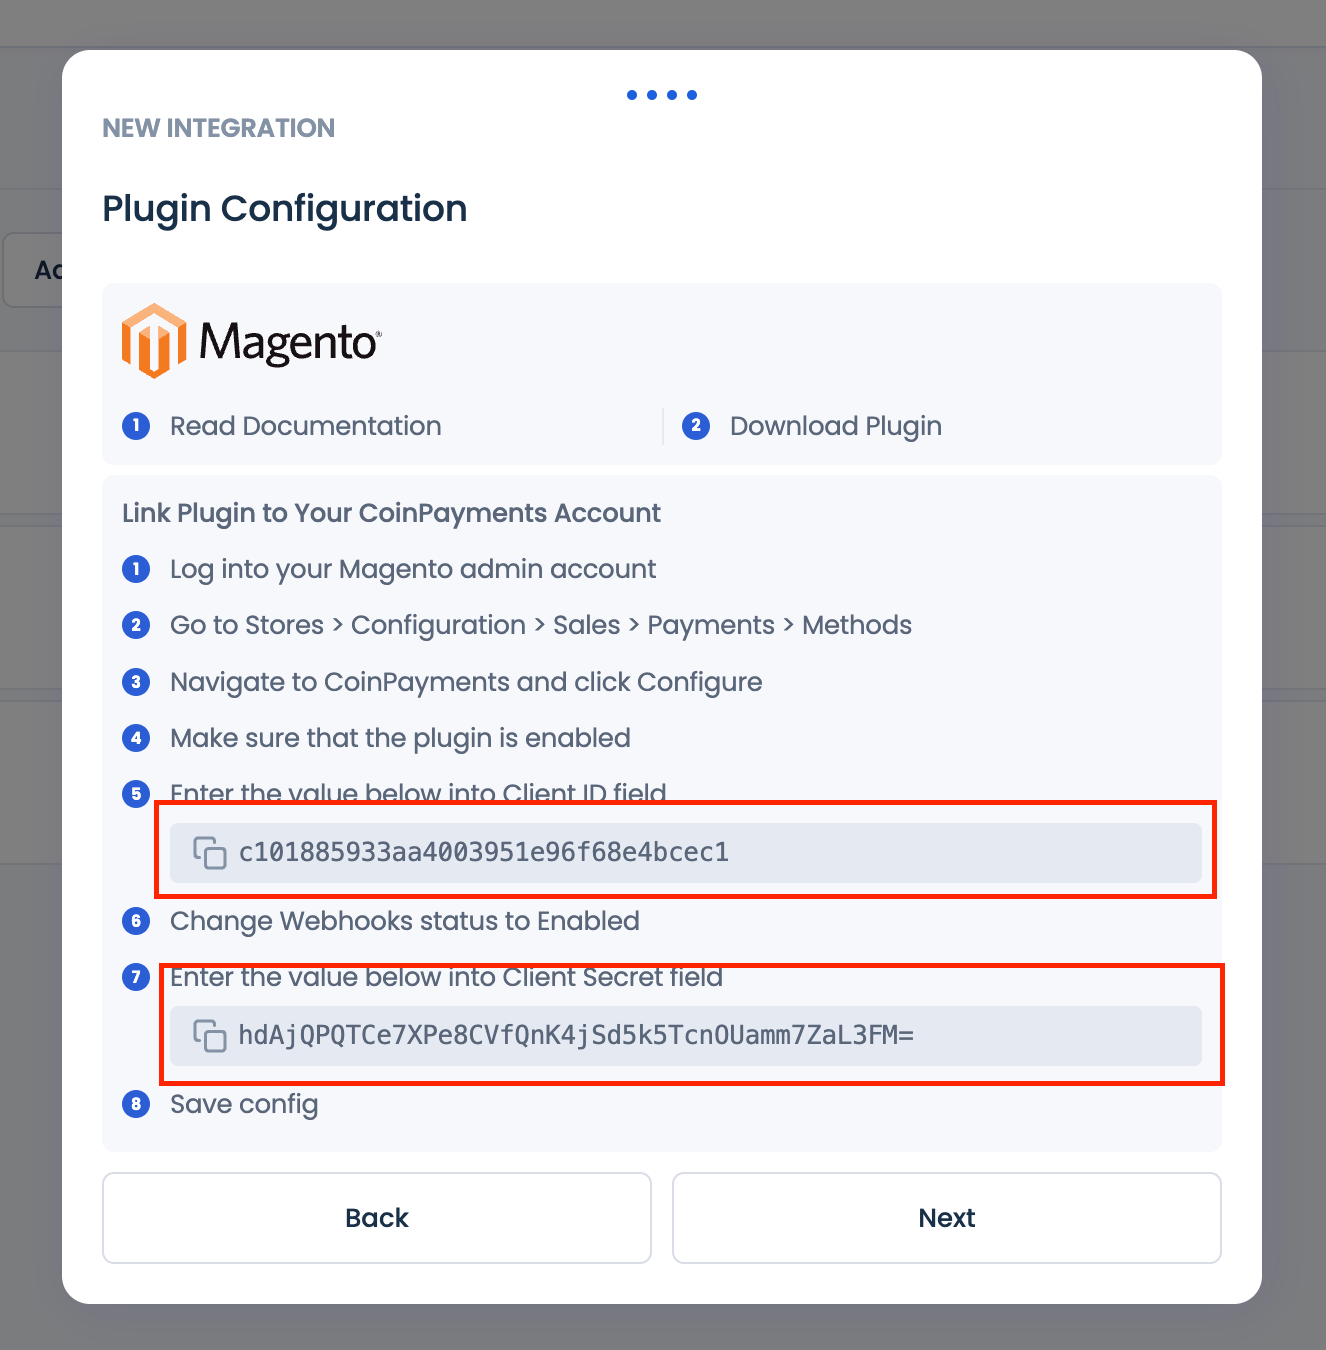
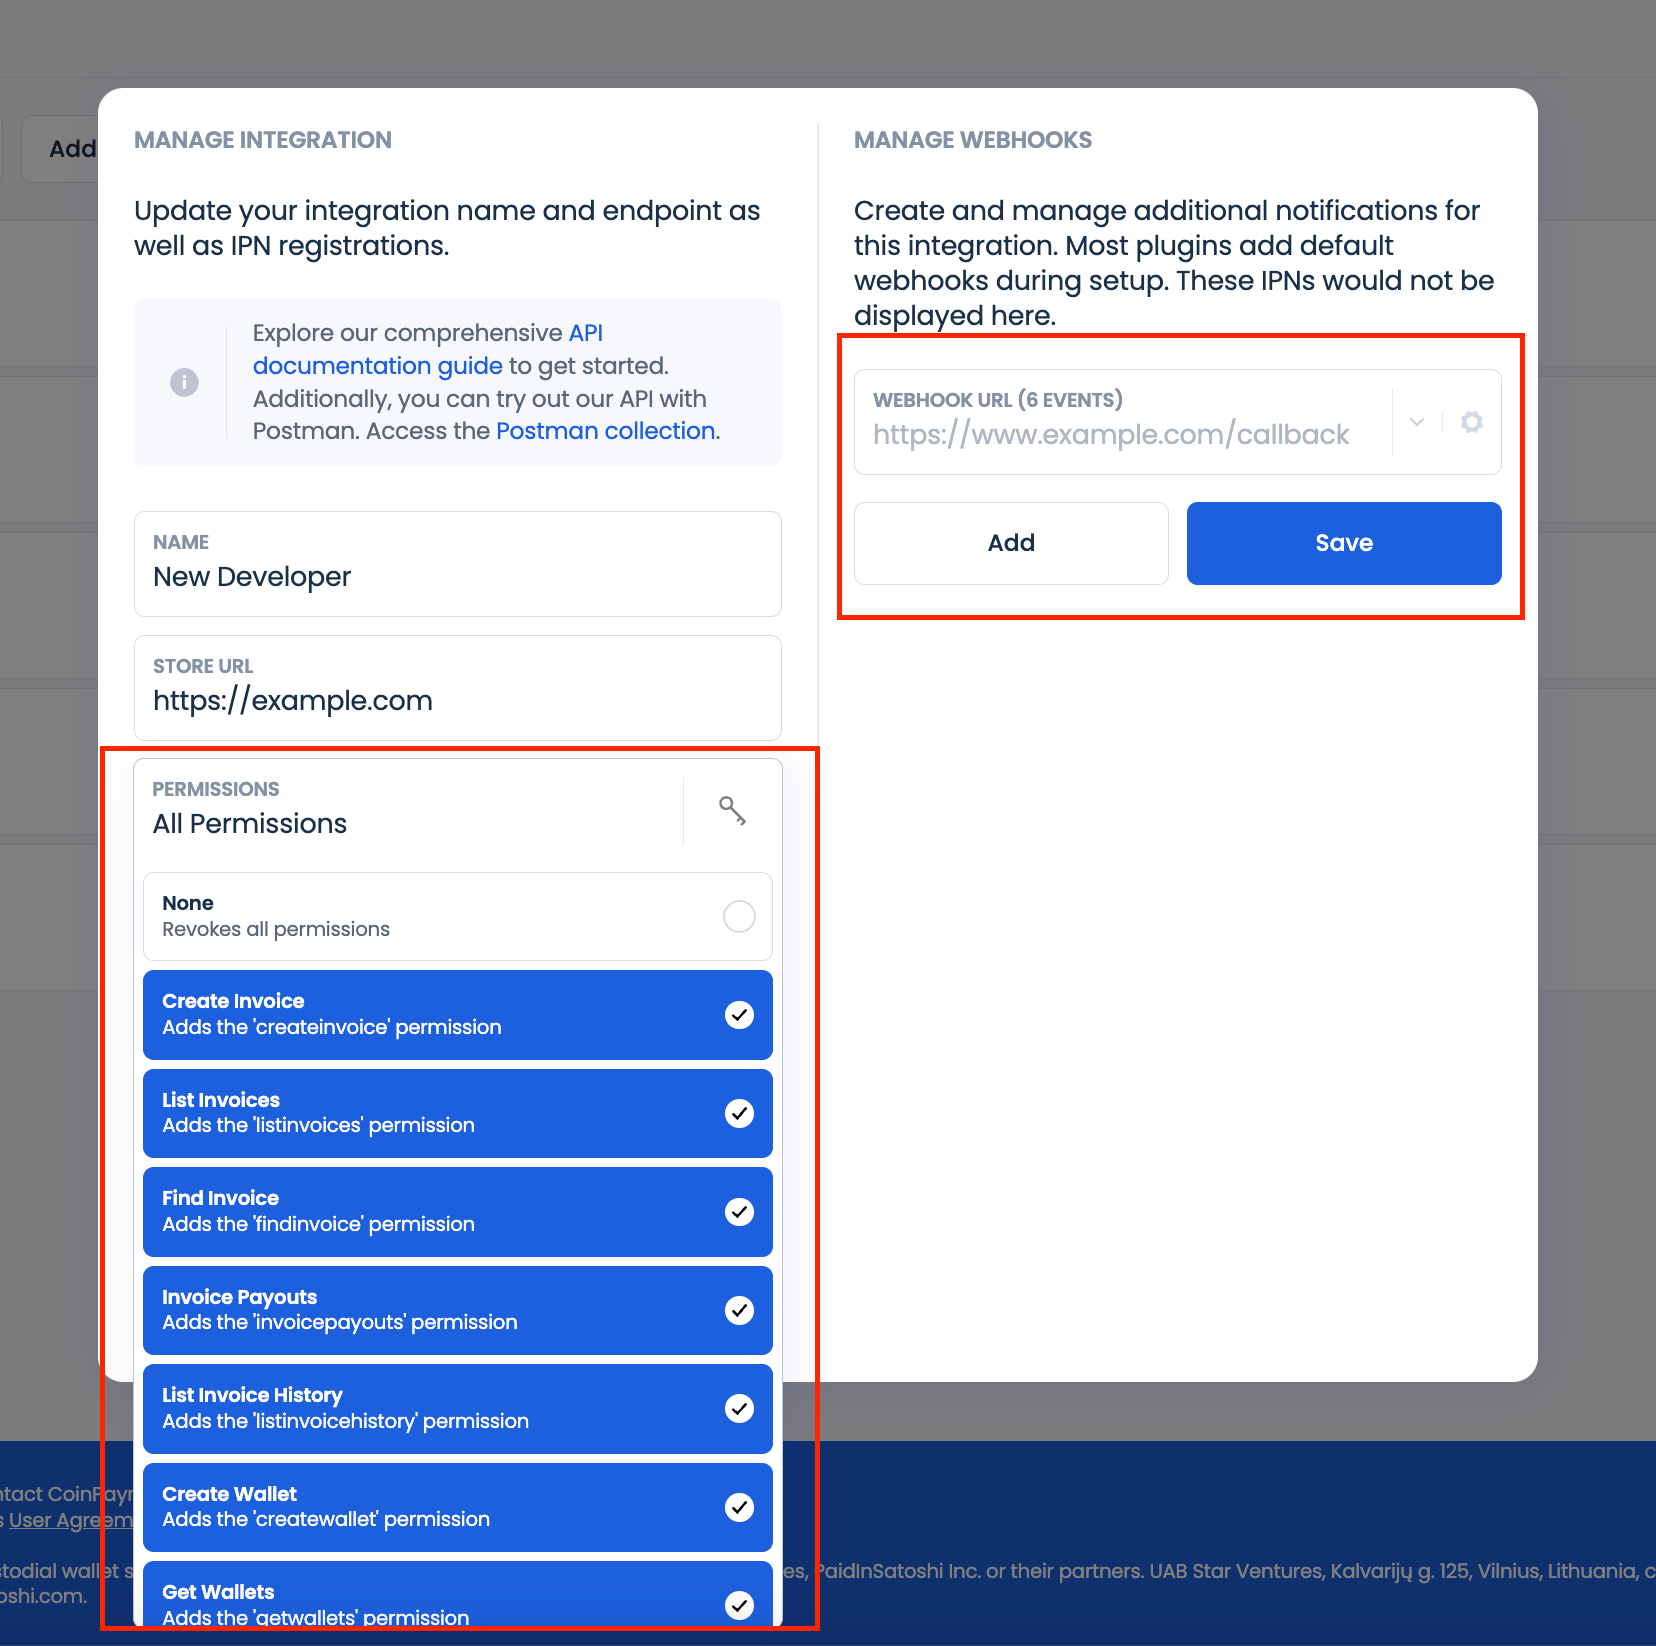
- Set Permissions and IP Whitelisting:
- Configure consumer permissions, allowed IPs, and webhook varieties to align with what you are promoting necessities.
Customized APIs
This integration sort calls for extra superior developer expertise in comparison with different CoinPayments instruments and is usually utilized for customized options. Frequent purposes embrace on-line casinos, companies providing subscription-based providers, and on-line outlets aiming to white-label the checkout course of. Additionally it is appropriate for different specialised use circumstances.
The API is designed to supply retailers with an easy and safe strategy to settle for cryptocurrency funds. For complete steerage and sources on integrating CoinPayments into your purposes, discuss with our detailed API documentation.
Methods to Get Began
- Navigate to the Integrations Tab:
- Go to the Integrations tab in your CoinPayments dashboard and click on on Add Integration.
- Choose API Integration:
- Select API Integrations when prompted to pick out an integration sort.
- Present Your Web site Hyperlink:
- Enter the web site URL to make sure easy communication between your system and CoinPayments.
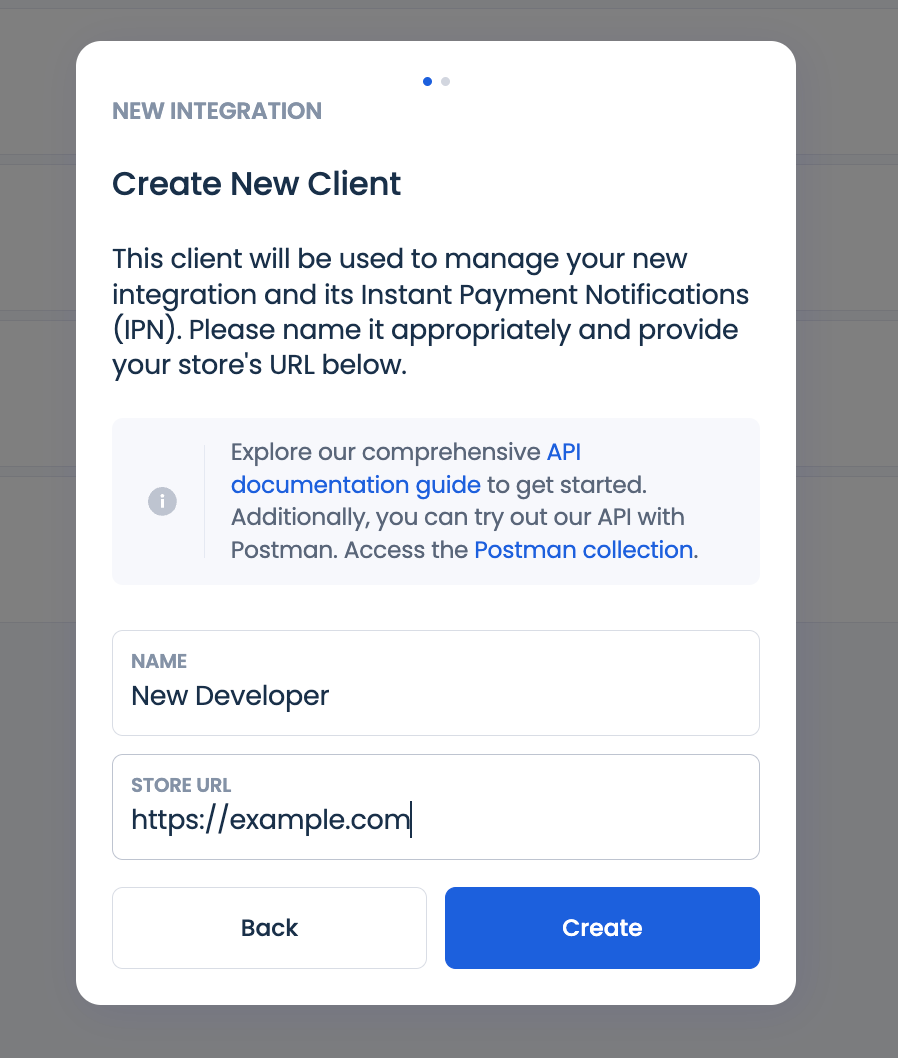
- Use CLIENT ID and CLIENT SECRET:
- Subsequent, use your CLIENT ID and your CLIENT SECRET within the API Configuration wizard to finish the mixing with the platform.
- Subsequent, use your CLIENT ID and your CLIENT SECRET within the API Configuration wizard to finish the mixing with the platform.
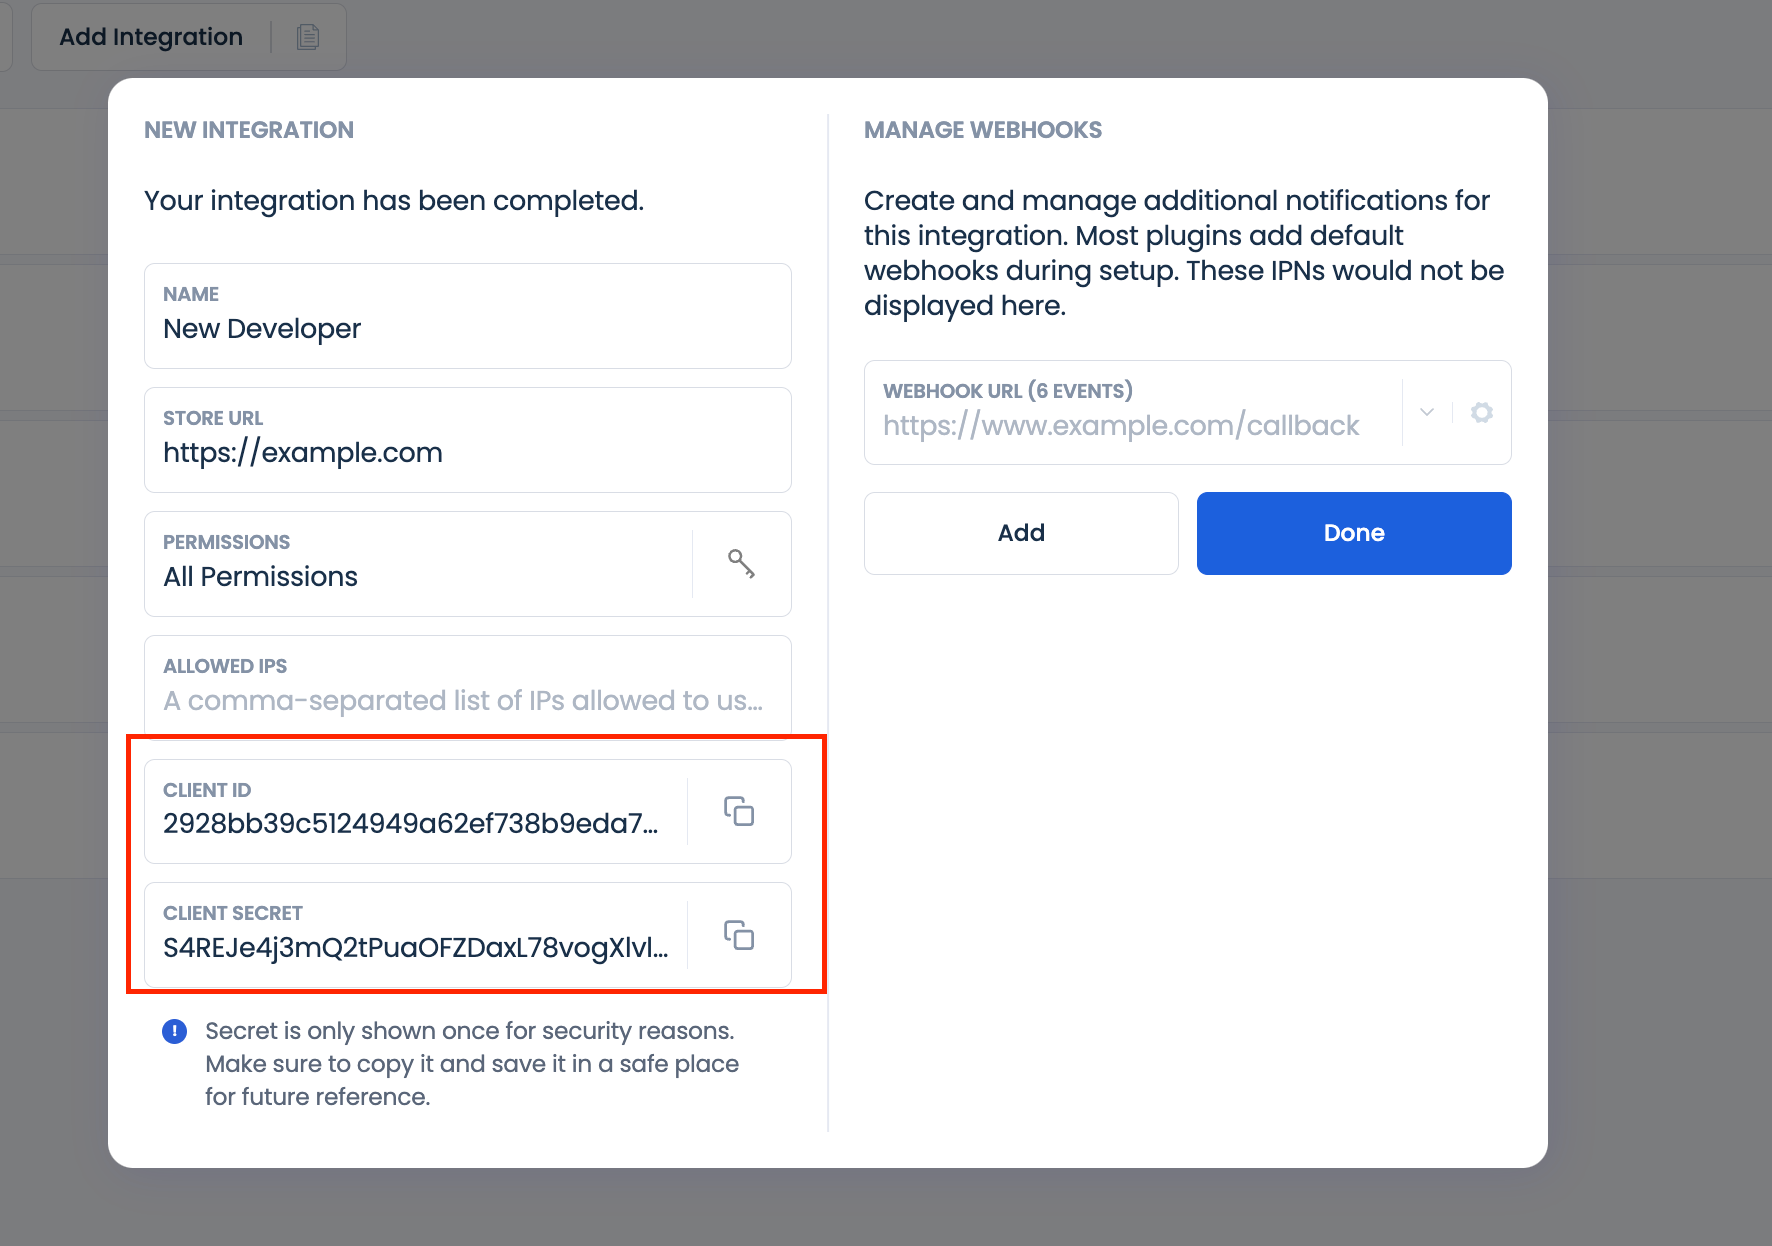
Be aware: The Shopper Secret is displayed solely as soon as for safety functions. Make sure you put it aside in a safe location.
- Configure Permissions and Webhook Sorts:
- Set consumer permissions and outline the varieties of webhook notifications wanted on your operations.